The Shift Assignments module allows you to schedule the availability of resources and locations based on shifts and work breaks defined in the Calendar Editor. When a location or resource goes off shift or on break, it is off-line or off-duty and is reported in the output statistics as non-scheduled time rather than downtime.
The off-shift and break logic are optional and allow you to control more precisely when a resource or location may go off shift, on break, and how long before it becomes available again.
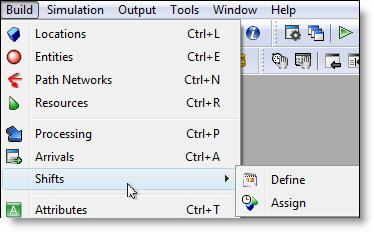
When you select Shifts from the Build menu, two options are displayed: Define and Assign. You must define a shift before you can assign a resource or location to it.
How to assign locations and resources to shifts:
1. Select Shifts from the Build menu, then click on Assign.

2. Select Locations - Click on the Locations button to display the Select Locations dialog (shown below). Click on a location and use the buttons to select or remove it from the Shift Locations list. Double clicking on a location also selects or removes it. Click OK when finished.

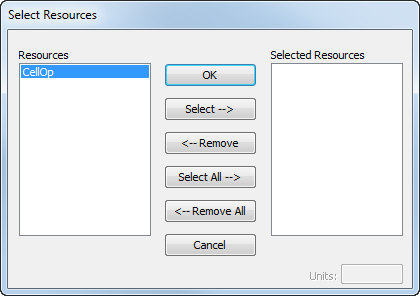
3. Select Resources - Click on the Resources button to display the Select Resources dialog (shown next). Click on a resource and use the buttons to select or remove it from the Shift Resources list. Double-clicking on a resource also selects or removes it. Click OK when finished.
4. Units - Enter the specific units of the selected resource to be assigned to the shift. You may assign one, several, or all units of a resource to a shift. You can also use a macro to specify the units. If left blank,
1,3 Units 1 and 3 only
1-3,5 Units 1 through 3 and 5 only
All All units of the resource
none You may use none to indicate that no unit will adopt this shift. This is useful in creating a scenario parameter. By using a macro to represent the number of units, the user may select none as an option.
Macro The name of a macro defined as a scenario parameter that allows the user to specify the units to be affected by the shift.
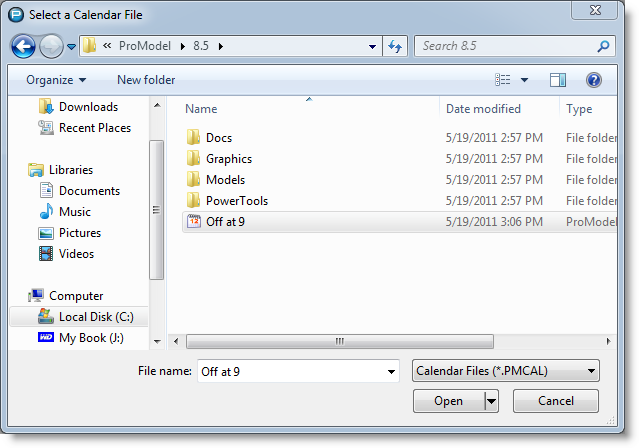
5. Select Calendar File - Click the Calendar File button. If a shift is already assigned, then the Select Shift Files dialog will open. If no Calendar File is assigned, then select a Calendar file from a location on your computer.
Please Note: A Calendar file must be a .PMCAL file in order to open.
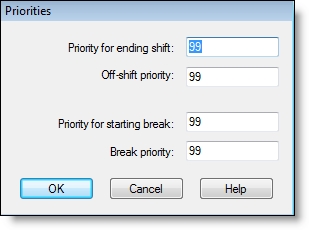
6. Define Priorities- Click on the Priorities button. The Priorities button allows you to enter the priorities for going off line due to a break or end-of-shift as well as the priorities of the off-line state in the event that some other activity attempts to bring a particular resource or location back on line. You can also use macros to specify priorities.
These priorities follow standard
Priority for Ending Shift This is the priority for regularly ending the shift. An entity or downtime must have a higher priority level to prevent this location or resource from going off shift at the preset time.
Off Shift Priority This is the priority for the location or resource to stay off shift. In other words, an entity or downtime must have a higher priority level to bring this location or resource back on line before the preset time.
Priority for Starting Break This is the priority for going on break. An entity or downtime must have a higher priority level to prevent this location or resource from going on break at the preset time.
Break Priority This is the priority for staying on break during the break period. In other words, an entity or downtime must have a higher priority level to bring this location or resource back on line before the end of the preset break.
|
© 2016 ProModel Corporation • 556 East Technology Avenue • Orem, UT 84097 • Support: 888-776-6633 • www.promodel.com |
